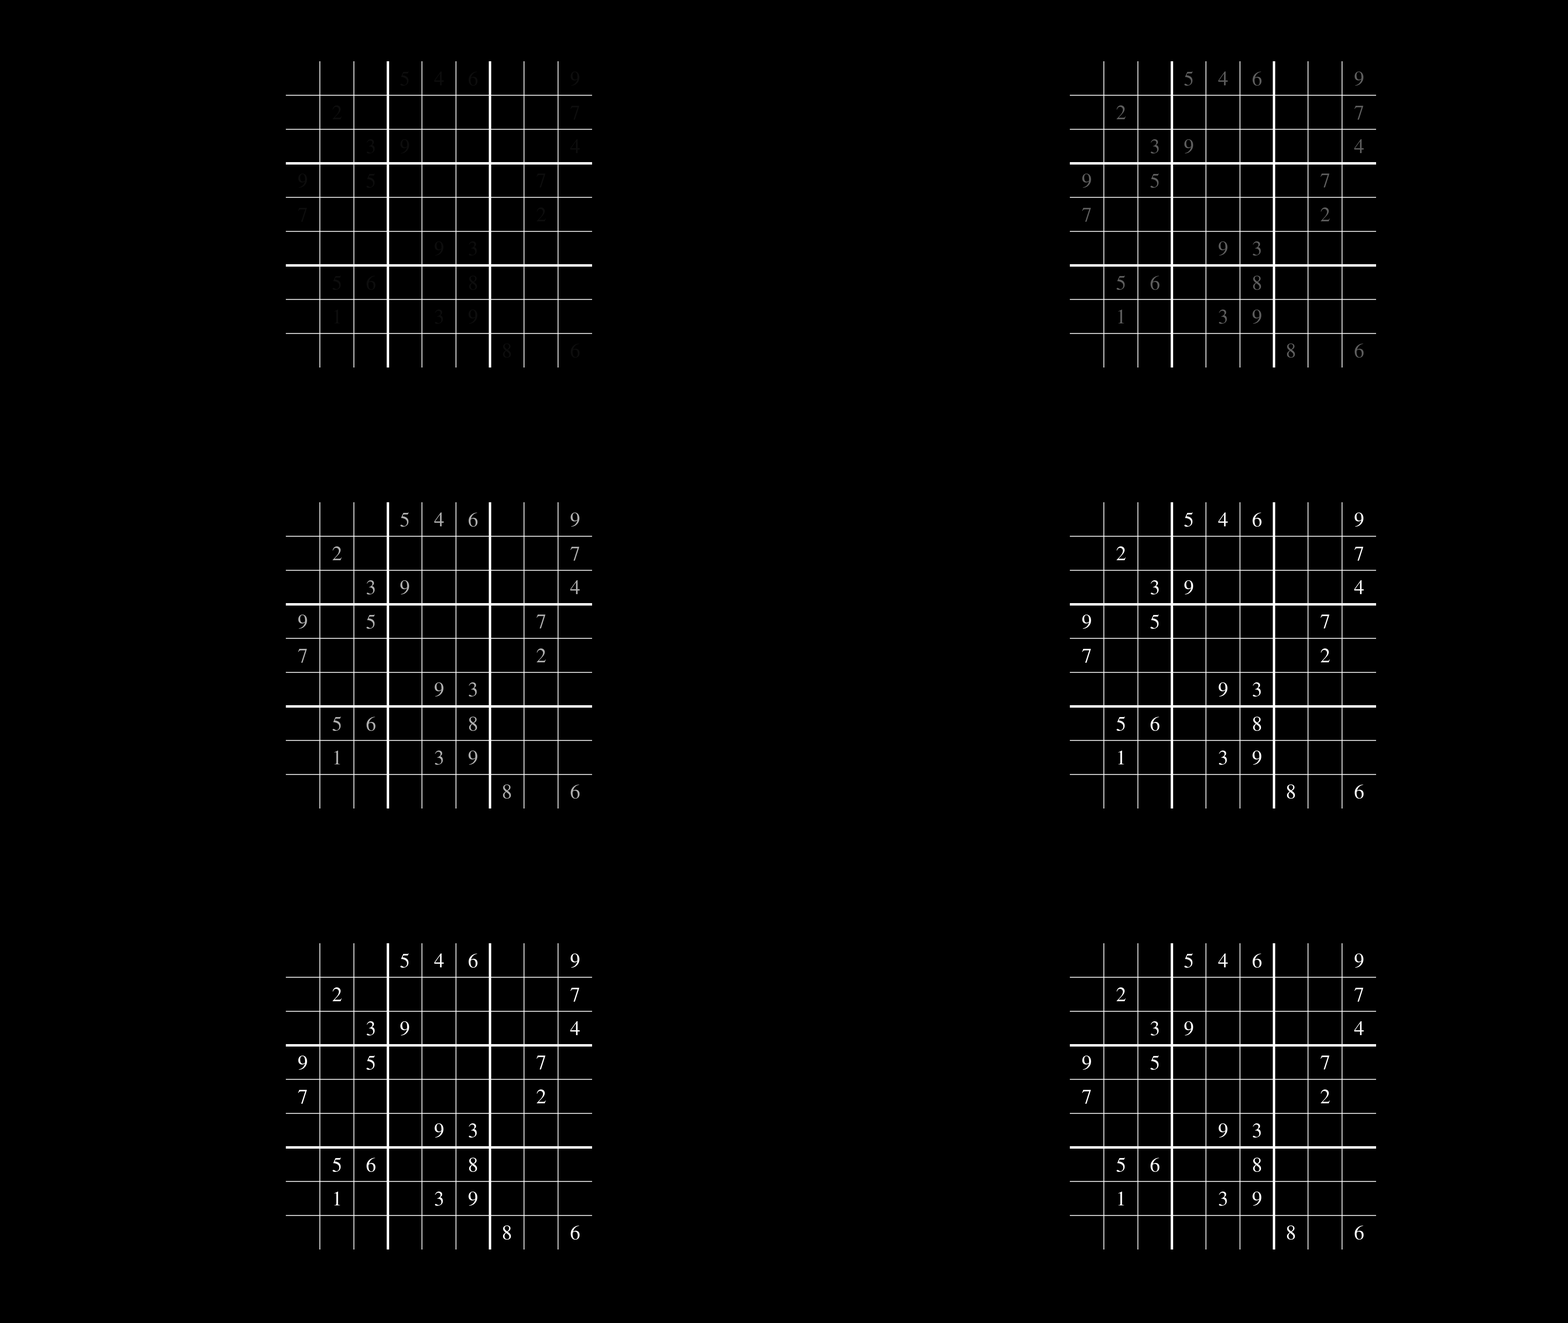
First YouTube video created with Javis
Creation date: 2021-06-12
Welcome back everyone! A new post in our Javis series this time. It's something quite special as it's the first time for me to create a full length YouTube video with Javis. I've used Javis for some animations on this blog such as these:
Nevertheless I haven't used it for bigger projects before.
The video is about one of my favorite projects: Writing a Sudoku solver. I think many programmers have tried programming something similar before or at least heard/read about those projects before. However, it is mostly done using backtracking, which basically involves two steps:
Trying out a number and check whether it works. If not then try the next number
If you tried all the numbers then go back to the last cell where you haven't tried all yet
Personally I find that rather boring but have to admit that it's a good introduction to something like recursion or more specific backtracking.
Some of you know however that I'm a huge fan of constraint programming as one can see by the number of blog posts I have written about it starting here. In constraint programming the constraint of Sudoku, which is called alldifferent constraint, is solved in a different fashion. Often it doesn't involve a single step of backtracking which is the reason I find it more fascinating.
Therefore, I have created the following video to explain the concept of how one can solve Sudokus using several techniques from graph theory.
If you haven't seen it yet, you probably want to give it a go, before diving into the creation process which is shown in this post.
Before we recreate parts of the video: I've started to create an email subscription list a while back. I would like to know more about how many people find these posts useful but I think it's also helpful for you 😉 It's often a bit hard to keep track of new posts when they don't get posted on a regular schedule. So if you want to get informed about new posts roughly once or twice a month consider subscribing to the list for free. Thanks a lot to everyone who already subscribed 🎉
Free Patreon newsletterWhat you'll learn
Some have asked whether I'll share the code of how I created the video. I don't think my code is particularly readable but I'll share it nonetheless. I highly encourage you to read this post though instead of going through the code yourself. But well here you have it...
In this post I'll show you my thought process as well as my creation of the video. I pick some of the parts from the code and explain them in some detail. This will especially involve the most used action, called change, which I think I haven't discussed before on this blog.
I'll assume that you have some knowledge of Javis like know what it is and maybe checked first tutorial or more 😉
Besides that it shouldn't be too complicated to understand my explanations.
Idea process
Will keep this one short as it isn't directly related to Javis . I just wanted to explain the idea process of this video a bit. I haven't seen any videos about the graph theory approach to solve Sudoku puzzles on the internet yet, but quite a lot of Sudoku backtracking videos. Furthermore, I wanted to start with a video idea for which I have enough knowledge to basically just put it into a video format without doing additional research 😄
As Javis needs some time to render the animation and I don't know beforehand what I wanted to say exactly I decided to render only the animated parts and slow the non moving parts down in post processing.
Coding
Let's get to the general structure of the code then. How about we start with animating the Sudoku grid itself?
I want to control any of the lines individually so I've created eight objects for the vertical lines and eight objects for the horizontal lines.
For this I created this small function which we walk through step by step:
function get_line_objects(frames, size_sudoku;
     anim_draw_len=30, xoffset=100, yoffset=100)

     hlines = [
          Object(frames,
               (args...; start=0, width=0, linewidth=2)->
                    myhline(start, width, linewidth),
                    Point(xoffset, yoffset+i*(size_sudoku / 9))
          )
          for i in 1:8
     ]
     act!(hlines, Action(1:anim_draw_len-1,
          change(:width, 0 => size_sudoku))
     )
     act!(hlines[[3,6]], Action(1:1, change(:linewidth, 6)))

     vlines = [
          Object(frames,
               (args...; start=0, height=0, linewidth=2)->
                    myvline(start, height, linewidth),
                    Point(xoffset+i*(size_sudoku / 9), yoffset)
          )
          for i in 1:8
     ]
     act!(vlines, Action(1:anim_draw_len-1,
          change(:height, 0 => size_sudoku))
     )
     act!(vlines[[3,6]], Action(1:1, change(:linewidth, 6)))

     return (hlines = hlines, vlines = vlines)
end
This function creates 16 objects, 8 for vertical lines and 8 for horizontal lines. We need to specify the size of the Sudoku as well as the frames on which it should be shown. Additionally we want to have it animated so we have a keyword argument for the length it should be animated for. Furthermore, we want to position the Sudoku with an xoffset and yoffset.
Let's have a look at the creation of the horizontal lines:
hlines = [
     Object(frames,
          (args...; start=0, width=0, linewidth=2)->
               myhline(start, width, linewidth),
               Point(xoffset, yoffset+i*(size_sudoku / 9))
     )
     for i in 1:8
]
I create a vector of objects here which are all shown for the specified number of frames. Each calls the function myhline when it gets drawn and is shifted depending on the offset and the current row. It has three keyword arguments start, width, linewidth which make it possible to later animate the horizontal lines and specify for which lines it should be thicker. The start is relevant for a later stage of the video where we focus on a single row. It's actually only used for vertical lines where we want to reduce the height to show only the third line and use start to start at the third row.
At the current stage of Javis we need to specify the arguments at two stages namely at left of the anonymous function and on the right. There might be a nicer way using macros in the future 😉
The myhline function is then a simple:
function myhline(start, width, linewidth)
    setline(linewidth)
    translate(start, 0)
    line(O, Point(width, 0), :stroke)
end
here we can use O as the origin as we translate to the start position and already shifted further with specify the Point when we define the object:
Object(frames,
          (args...; start=0, width=0, linewidth=2)->
               myhline(start, width, linewidth),
               Point(xoffset, yoffset+i*(size_sudoku / 9)) # <--- here
     )
Now let's go back to the get_line_objects function and specify some actions:
act!(hlines, Action(1:anim_draw_len-1, change(:width, 0 => size_sudoku)))
act!(hlines[[3,6]], Action(1:1, change(:linewidth, 6)))
the first line is used to animate the drawing of the line. The second is used to have wider lines to mark the blocks of the Sudoku. The change keyword changes the keyword with the specified name from x to y when written as x => y in the set time frame. In the backend this does an interpolation of the values between x and y. Here it just increases the width of the lines. In the second line it simply sets it to the value without any interpolation.

The next step now was to fill the grid with some numbers which is done in a similar way but involves a bit more on the display function side as I used it to display a single number as well as which numbers are possible for the empty cells.
function create_sudoku_objects(frames, size_sudoku; xoffset=100, yoffset=100)
    so = Array{Object}(undef, (9,9))
    changed = Array{Object}(undef, (9,9))
    for i in 1:9, j in 1:9
        so[i,j] = Object(frames,
          (args...; numbers=Int[], fixed=false,
                    color="white", fsize_fixed=50,
                    fsize_all=28, size=size_sudoku/9,
                    extra=-1)->
                    sudoku_cell(numbers, fixed, color;
                         fsize_fixed, fsize_all, size, extra),
                         Point(xoffset+(j-1)*(size_sudoku/9)+(size_sudoku/18),
                              yoffset+(i-1)*(size_sudoku/9)+(size_sudoku/18))
          )
        changed[i,j] = Object(frames,
          (args...; l=0.0, color="yellow", width=size_sudoku/9,
           height=size_sudoku/9)->
               cell_highlight(l, color, width, height),
               Point(xoffset+(j-1)*(size_sudoku/9)+(size_sudoku/18),
                    yoffset+(i-1)*(size_sudoku/9)+(size_sudoku/18))
          )
    end
    return so, changed
end
I'll focus on the so[i,j] part and ignore changed[i,j] mostly. The so stands for something like Sudoku objects 😉 and is a \(9 \times 9\) array here. It is used to have an object for each of the 81 cells. It takes even more keyword arguments than the one before.
A small explanation for all of them:
numbers: a vector of possible numbersfixed: true if only the first number of numbers should be showncolor: color of the text for a fixed number (the others are just red and green 😄)fsize_fixed: font size of the fixed numberfsize_all: font size for the other numberssize: the width/height of the cellextra:-1 by default but otherwise a number insidenumberswhich should be highlighted in blue (yes that color is also fixed 😄)
The sudoku_cell function then basically checks whether it's a single number based on fixed sets the applicable font size. And checks whether the numbers from 1-9 are possible when fixed = false and changes between a red and green color accordingly.

With actions and using the change function as before we can then change what should be displayed in each cell. For this displaying of the numbers I simply used:
act!(so[i,j], Action(framestart:framestart, change(:numbers, [grid[i,j]])))
act!(so[i,j], Action(framestart:framestart, change(:fixed, true)))
act!(so[i,j], Action(framestart:framestart+anim_draw_len-1, appear(:fade)))
where grid is a simple \(9 \times 9\) array which saves the state of the Sudoku. I only applied those actions to Sudoku cells which are not 0 then to get the above animation.
One rather crucial point was to combine all of these objects into a data structure to make it easier to handle. As an example I wanted to call a method with just all Sudoku objects as hlines, vlines and the cell objects as well as the objects to highlight a single cell etc.
For this I created a SudokuAnim struct which also acts a bit like a layer such that I implemented stuff like move the whole Sudoku x pixels to the left. Once we have layer support some of this might not be necessary anymore.
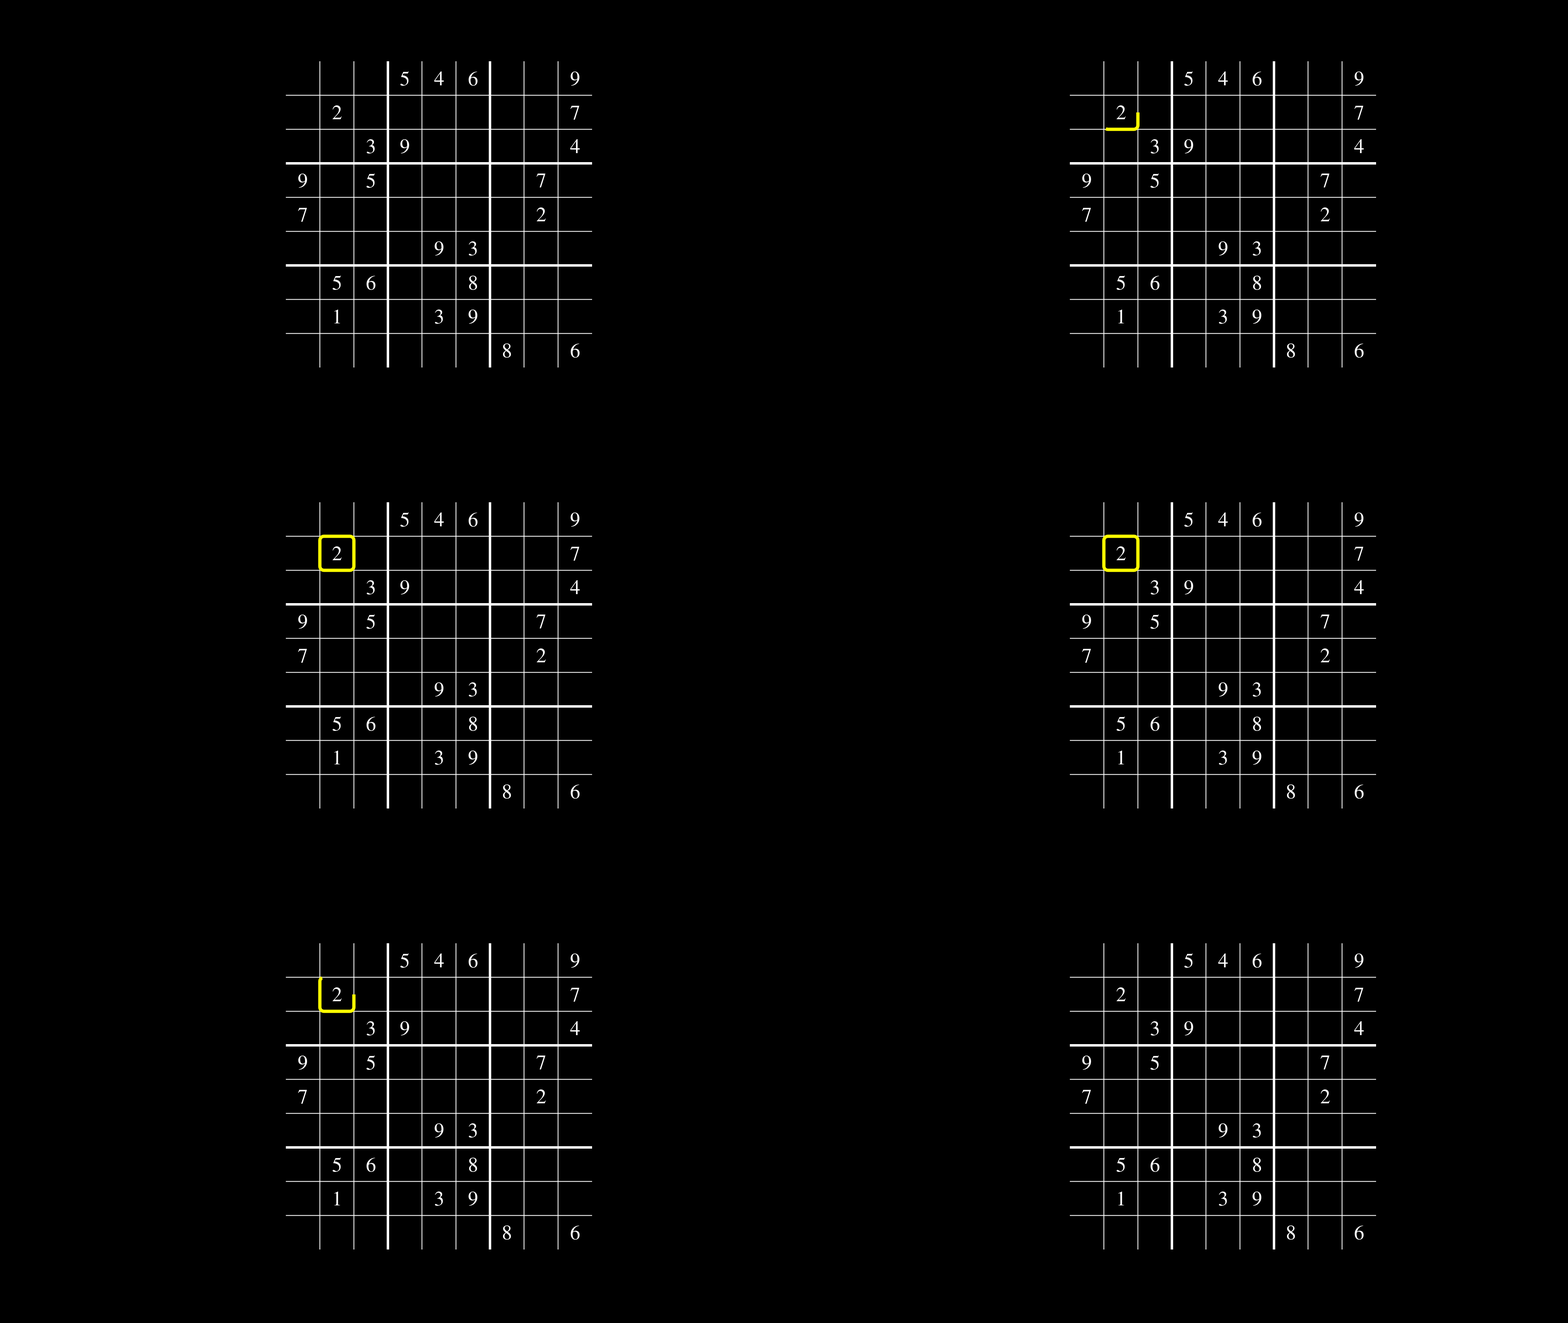
Most of the other stuff in the video is from the basics very similar to the code that I have shown above. One thing that might not be clear yet is how I animated the drawing around a cell to highlight it yet.
The creation of all the objects is shown above so let's just have a look at the cell_highlight function itself:
function cell_highlight(l, color, width, height)
    setline(8)
    sethue(color)
    # penultimate is corner radius
    if l == 1
        box(O, width, height, 10, :stroke)
    else
        box(O, width, height, 10, :path)
        p = pathtopoly()[1]
        push!(p, p[1])
        points = polyportion(polysample(p, 1000), l)
        poly(points, :stroke)
    end
end
The l parameter is a value from 0 to 1 and defines how much of the highlight box gets shown. It's 1 at the end such that I just draw the box. For the animation I basically use change(:l, 0 => 1) to interpolate between no highlight and the full box.
Now with some Luxor functions we can get the outline :path of the box and get the points with pathtopoly. Using polysample we can then create more points to define the outline which is needed for polyportion. The polyportion function simply takes a portion of the given polygon.
I would love to make it more automatic with some Javis magic but that's how it needs to be done for now.
Let me show you the outcome of highlighting a cell though.

I'll give you the rest of the video code as an exercise and refer you to this gist for a solution. 😉
Workflow
There were some workflows that I haven't used before this longer video and some of them are not in an official Javis version yet, but as they hopefully will be in the near future I want to discuss here.
I especially liked a new way of preview system which I didn't consider as a preview system before which is livestreaming. But let's talk about the problem first. When I do some animation I want to see the effect as early as possible. Unfortunately rendering it to either gif or mp4 involves reloading that file in some kind of image/video viewer which slows down the process. Luckily one of our Google Summer of Code students named Arsh Sharma created PR#337 for livestreaming support. I used this to livestream to OBS which updated the stream automatically. It currently doesn't stream it live as it first gets rendered but it helped speeding up my workflow.
Let me discuss one other tool of Javis here for that matter and address some current problems with it as an outlook into the future workflow tools I would like to see 😉 We have a live viewer GUI which is quite handy to directly see specific frames of an animation without rendering all previous frames. Unfortunately the tool creates a new window each time which got a bit annoying after a couple of reruns. It also does not support auto playing the animation at this moment. However it has one very nice feature as it gets started immediately and renders single frames so is very fast.
Another one that will be available in a future Javis version is rendering only specified frame ranges to a file which is PR#342. It can be used to render only the frames 100:130 to a gif/mp4 for example. Frames before need to be computed though as they can be important for some of the animations but it still saves time to not render all of it to a file.
If you're interested in some other workflows for different tasks you might want to checkout our workflow section in the Javis docs.
Post processing
Just some minor things about creating the final video at the end of rendering.
I used the open source video editor kdenlive to cut the video and add my voice commentary 😄 As mentioned before I tried to reduce the Javis render time by only rendering the animations whereas in the final video some sections are still frames for about a minute when I explain something. This gave me the freedom to easily go more into detail with explanations later.
Therefore, I split the video into small snippets of animated and still sections and slowed down those still sections to fit my commentary. On the other hand I actually speed up the animation of drawing the cycles at the latter stage of the video as I reckoned it isn't that interesting.
Reflection
Let's chat a bit about my experience as one of the creators of Javis while working on this first video. I know I have a pretty unique perspective here as I didn't need to check docs or anything. Nevertheless it might be a good idea to reflect a bit on the parts that worked nicely and the parts that were a bit rough. We'll work on those things to make it a better experience for us video creators 🎬 .
How about we start with the positive things?
Having the freedom to do whatever I want to draw and change things using the
changefunction was really niceUsing
appear(:fade)was nice to have even though one could easily handle it withchangeas wellThe livestreaming worklow worked out very nicely
Now let's get to the dark side of Javis at this stage
Keeping track of all the frames is a bit of a hassle and my naming of those variables wasn't ... well great
An even better workflow than livestreaming which allows one to have it live would be nice
Basically a live viewer which doesn't create a new gui window each time as well as having an auto play option
Combining some parts into a layer would make it easier to focus on some parts in videos such as
Scaling down some parts and shift them to the side to discuss something else. This could have been useful for explaining more what matchings are or how it would look like with a free vertex. The latter was just a hassle to include as I would have needed to shift and scale so much that I decided to not go down that road for my first video.
I think those are the main pain points I had at the moment. Nevertheless it would also be nice to have an easier way to create some special animations like the drawing of the lines in the Sudoku might be as simple as appear(:line) or something instead of fiddling with the change functionality. Furthermore having some simpler way to draw the graph animations would also be of immense help and is actually the project of the second GSoC student Debabrata Mandal. Looking forward to that for future videos.
Hope you learned something about the creation of the first Javis video and maybe want to test it out yourself. Looking forward to your creations!
Thanks everyone for checking out my blog and see you in the next one. Oh and don't forget to subscribe to the e-mail list if you like.
Thanks to my 12 patrons!
Special special thanks to my >4$ patrons. The ones I thought couldn't be found 😄
Anonymous
Kangpyo
Gurvesh Sanghera
Szymon Bęczkowski
Colin Phillips
For a donation of a single dollar per month you get early access to these posts. Your support will increase the time I can spend on working on this blog.
There is also a special tier if you want to get some help for your own project. You can checkout my mentoring post if you're interested in that and feel free to write me an E-mail if you have questions: o.kroeger <at> opensourc.es
I'll keep you updated on Twitter OpenSourcES.
Want to be updated? Consider subscribing on Patreon for free


